
A hot water heater is a vital appliance in every household, providing us with the luxury of warm baths and showers. However, like any other appliance, it requires regular maintenance to ensure its longevity and optimal performance. One essential maintenance task is draining the hot water heater. Draining the tank periodically helps remove sediment buildup and extend the life of the heater, while also enhancing its energy efficiency. In this step-by-step guide, we’ll walk you through the process of draining your hot water heater, with insights from Wolfer’s Home Services, a trusted name in the industry.
Step 1: Safety First
Before you begin, safety should be your top priority. Always turn off the power supply to the hot water heater. For electric heaters, find the breaker labeled “water heater” and switch it off. For gas heaters, locate the gas supply valve and turn it off. Allow the water heater to cool for a few hours to avoid any risk of scalding.
Step 2: Gather Your Tools
To perform the task efficiently, you’ll need a few tools on hand. Grab a garden hose, a bucket, pliers, and gloves. If you’re uncertain about any step, don’t hesitate to consult professionals like Wolfer’s Home Services for guidance.
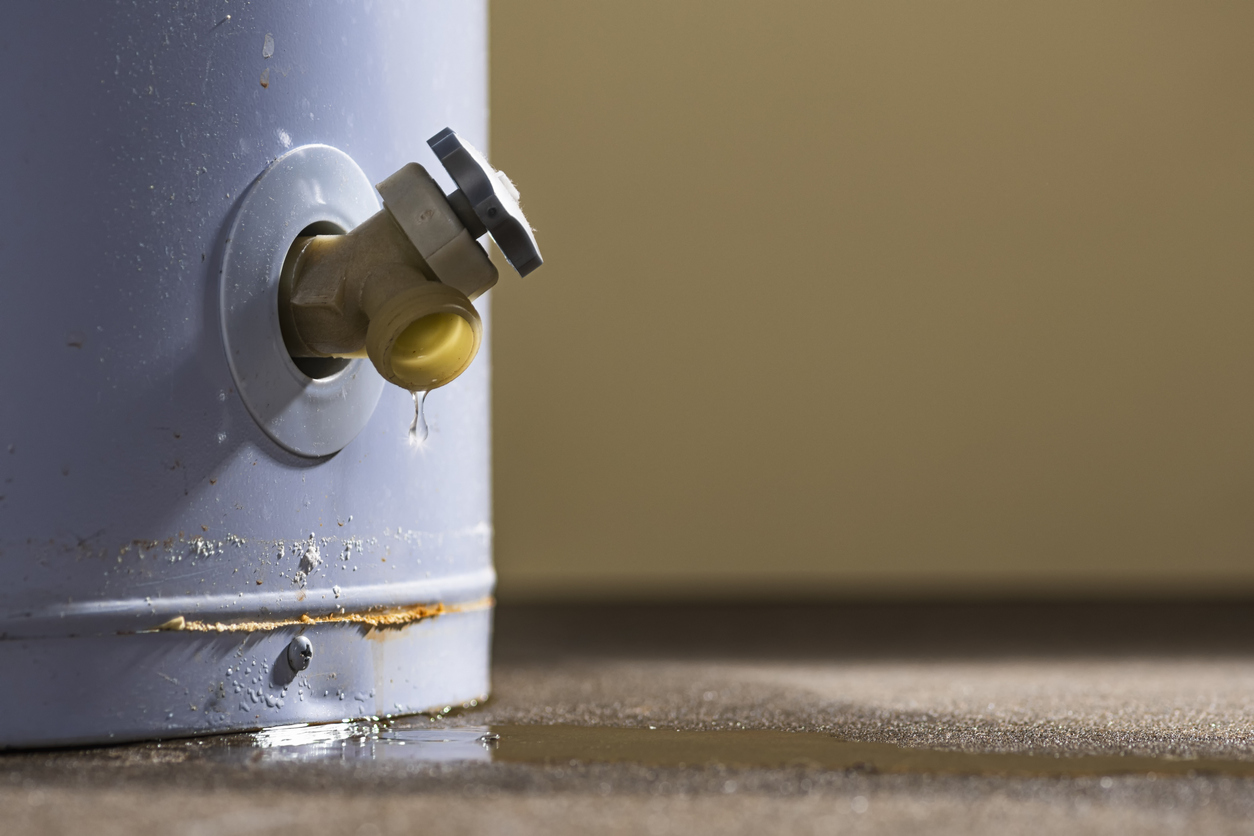
Step 3: Locate the Drain Valve
The next step is to find the drain valve on the hot water heater. It is usually located near the bottom of the tank and can be identified as a spigot or a simple valve. The valve may have a handle or a slot for a screwdriver.
Step 4: Connect the Garden Hose
Once you’ve located the drain valve, attach one end of the garden hose to it. Ensure that the hose is securely connected to avoid any leaks during the draining process. Place the other end of the hose either outside or in a large bucket where the water can safely drain.
Step 5: Open the Pressure Relief Valve
To drain the hot water heater effectively, you need to allow air to enter the tank. Find the pressure relief valve, usually situated at the top of the heater, and open it. This step is crucial as it allows the water to flow freely through the hose.
Step 6: Begin Draining
With the pressure relief valve open, slowly open the drain valve on the hot water heater. The water will start flowing through the hose. Be patient, as this process may take some time, depending on the size of your tank.
Step 7: Check for Sediment
As the water flows out of the tank, keep an eye out for any sediment or debris. Sediment buildup is a common issue in hot water heaters, and draining helps remove these particles, ensuring better heater performance and increased efficiency. If you notice a lot of sediment, consider contacting Wolfer’s Home Services to perform a thorough cleaning.
Step 8: Flush the Tank
After the tank is drained, you can flush it by briefly turning on the water supply. This helps remove any remaining sediment that might be sticking to the bottom of the tank.
Step 9: Refill the Tank
Once you’re satisfied that the tank is clean, close the drain valve and disconnect the hose. Turn on the water supply and allow the tank to fill up. While doing so, keep the hot water faucet in your home open to remove any air bubbles from the system.
Conclusion
Regularly draining your hot water heater is a simple yet essential maintenance task that can greatly benefit your appliance’s performance and longevity. By following this step-by-step guide from Wolfer’s Home Services, you can ensure that your hot water heater continues to provide you with reliable and efficient hot water for years to come. Remember, if you ever encounter any issues or need professional assistance, don’t hesitate to reach out to our trusted experts in the industry.